DLMM Positioning Between Walls
Setting LP ranges between liquidity walls.
LP positioning as a strategy
Previous sections covered spot and perps. This one is for LPs. CLOBr shows you where to set your ranges in concentrated pools like Meteora DLMMs and Raydium CLMMs.
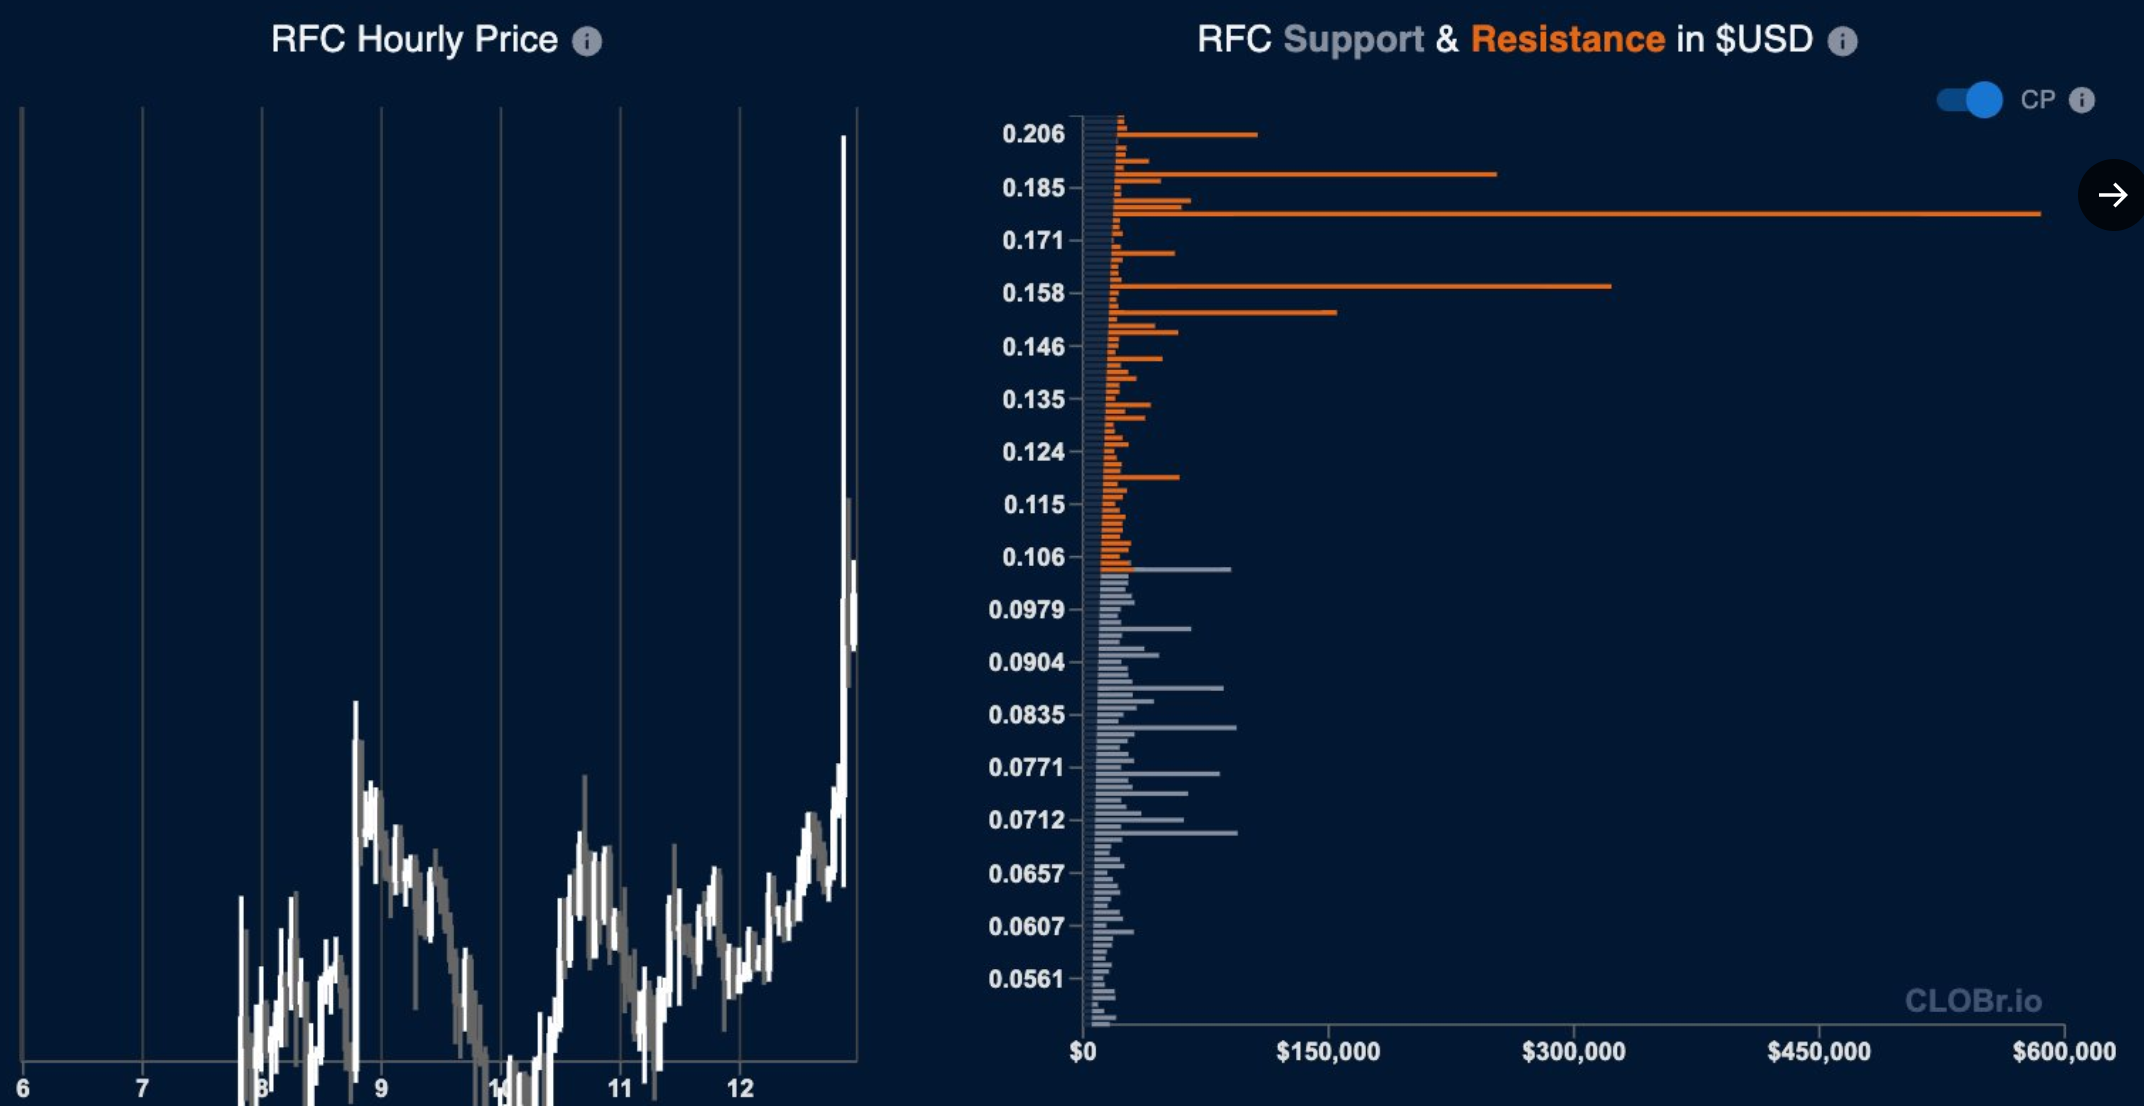

Use CLOBr to position your DLMM for max yield
Meteora DLMMs
DLMMs give you more control than standard concentrated liquidity pools:
- Dynamic fees: Fees auto-increase during high volume, so you earn more when the action picks up.
- Customizable parameters: Base fees, max fees, bin widths -- you control the setup.
- 3 allocation patterns: Spot, curve, and bid-ask distributions let you match your strategy to market conditions.
- Partial withdrawals: Pull from specific bins without closing the whole position. Take profits or adjust size on the fly.
DLMM vs. Traditional Concentrated Liquidity
| Feature | Traditional CL (Orca/Raydium) | DLMM (Meteora) |
|---|---|---|
| Customizable Parameters | Limited (mainly range width) | Highly customizable (base/max fees, bin widths, allocation patterns, more) |
| Fee Optimization | None | Automatic fee increases during high activity; can optimize for yield |
| Allocation Strategies | Single distribution pattern | 3 allocation patterns, tailored to market expectations |
| Capital Efficiency | Good when positioned correctly, but static | Higher, as positions can be partially withdrawn to optimize exposure and yield |
| Strategy Complexity | Moderate | Higher, with more options and dynamic management |
What CLOBr adds for LPs
CLOBr shows you the liquidity landscape so you can position smarter:
Wall identification
- Natural price boundaries = natural range boundaries
- See where trading activity will concentrate
- Spot zones with competing liquidity (avoid those)
- Read what other market participants are doing
CLOBr's edge
- Aggregates across pools and platforms -- full picture, not just one DEX
- Pair exposure shows you if a wall is solid or hollow
- Gaps in liquidity = opportunity zones for LPs
- Real-time data so you can adjust as things change
Three positioning strategies
Three ways to use CLOBr walls for LP positioning:
Strategy 1: Range Trading Between Walls
Put your liquidity between a buy wall and a sell wall. Earn fees as price bounces around inside:
- Identify Persistent Walls: Use CLOBr to find established buy and sell walls that have contained price action for a while
- Verify Wall Quality: Confirm walls have strong stablecoin backing and significant size to ensure persistence
- Establish Position Range: Set DLMM position with lower bound at the buy wall and upper bound at the sell wall
- Monitor Wall Evolution: Regularly check CLOBr to ensure walls remain intact; adjust position if walls shift
Strategy 2: Liquidity Gap Filling
Find gaps where liquidity is thin and fill them. Less competition = more fees per dollar deployed:
- Locate Liquidity Gaps: Use CLOBr to identify significant gaps between established liquidity zones
- Assess Trading Volume: Verify the gap area experiences actual trading volume to ensure fee generation
- Narrower Range Setting: Position DLMM with a tighter range focused specifically on the identified gap
- Higher Fee Tier Selection: Consider using higher fee tiers for gap positions to maximize yield
- Risk Management: Monitor closely as gaps may exist due to volatility or rapid price transitions
Best for: Active traders seeking higher yields, shorter time horizons, more frequent adjustments
Strategy 3: Wall Reinforcement
Add your liquidity to an existing wall. You earn fees from bounces while making the wall stronger:
- Select Wall to Reinforce: Identify a wall that aligns with your market view (support wall for bullish, resistance for bearish)
- Analyze Wall Composition: Use CLOBr's pair exposure analysis to verify wall stability before reinforcing
- Position Asymmetrically: Place DLMM position with a short range ending at the target wall, extending a few bins out on the side you expect price to remain. This captures the fees as the price bounces off and retests the wall.
- Token Ratio Consideration: Adjust initial token ratio to match expected price behavior around the wall
- Defensive Parameters: Set tighter rebalancing thresholds to protect against sudden wall breakthrough
Best for: Strong market conviction, situations where you want to both earn fees and influence market structure
Tuning your DLMM parameters
CLOBr's liquidity data can inform each parameter choice:
| Parameter | CLOBr Insight | Optimization Strategy |
|---|---|---|
| Range Width | Distance between walls | Set range width to capture 100% of space between major walls without letting capital sit idle |
| Rebalancing Threshold | Wall strength assessment | Tighter thresholds near weak walls, wider near strong walls |
| Fee Tier | Trading activity in range | Higher fee tiers in gaps with high price velocity |
| Initial Token Ratio | Current position in range | Skew toward token likely to appreciate based on wall positions |
| Position Size | Competition analysis | Larger in areas with less competing liquidity |
Example: BONK DLMM position
Here's how you'd set up a BONK LP position using CLOBr:
Market Analysis with CLOBr
- Current BONK price: $0.000029
- Major buy wall identified at $0.000025 (significant size, 80% USDC)
- Major sell wall identified at $0.000035 (significant size, 70% USDC)
- Thinner liquidity in $0.000027-$0.000033 range
- Historical trading pattern shows price often ranges between these walls
DLMM Position Strategy:
- Strategy Selection: Range Trading Between Walls
- Position Parameters:
- Lower Bound: $0.000025 (at the buy wall)
- Upper Bound: $0.000035 (at the sell wall)
- Fee Tier: 0.2% (medium, as range is relatively wide)
- Initial Ratio: 60% BONK / 40% USDC (slight BONK bias given current price position)
- Allocation Pattern: Curve or spot to capture more fees during the oscillation, or Bid Ask if you plan to rebalance at the walls
- Monitoring Plan:
- Check CLOBr daily for wall integrity and liquidity shifts
- Reassess position if either wall decreases by 30%+
- Consider partial withdrawals if price approaches the upper or lower bound and walls begin to dissolve, more if the walls are significantly reduced
- Track trading volume within range for fee optimization
Risks to watch
Impermanent Loss Risk
Price moves outside your range = impermanent loss.
Mitigation: Pick ranges with strong walls on both sides. Size moderately. Only LP in high-volume pools where fees can offset IL.
Wall Dissolution Risk
Walls can disappear. Your range boundaries are gone.
Mitigation: Check daily. If a wall shrinks significantly, adjust or exit.
Low Fee Generation Risk
No volume in your range = no fees.
Mitigation: Check historical volume in your target range before deploying. If it's dead, reposition.
Parameter Optimization Risk
Wrong parameters = leaving money on the table.
Mitigation: Start small, test your settings, adjust based on actual results.
Bottom line
- Set your ranges using real market structure, not guesswork.
- Range trade, fill gaps, or reinforce walls -- pick the approach that fits.
- Walls move. Check CLOBr regularly and adjust.
- Balance fee potential against IL risk. Strong walls on both sides of your range help.